How Do I Create a Custom Transfer Phrase?
Follow this guide to learn how to create a custom transfer phrase.
Begin in your SalesAi account.
- Click on 'Ai Voice'

- Click 'Create Agent' for a new agent, or click the 3 dots on an existing agent to edit the transfer phrase.

- Select if this is an Inbound or Outbound Agent, then click 'Next'

- Fill in the Agent Settings, then click 'Next'


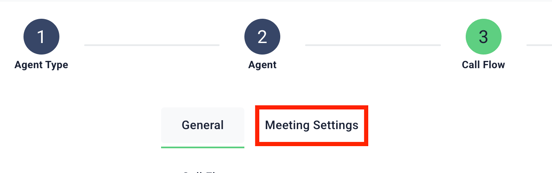
- Select your Call Flow, then enter your prompt, qualifications/objections, and knowledge base.


- Now select your Call to Action
- If this toggle is Off, there will be no CTA. This means the Ai Agent will not transfer nor book a meeting. This is best for FAQ agents or agents who are made to gather data.

- Choose between 'Book a Meeting', 'Live Transfer', or 'Live Transfer - Number Directory'

- Once you select your booking mode and who you're booking with, you will then adjust your Meeting Settings at the top of the page.
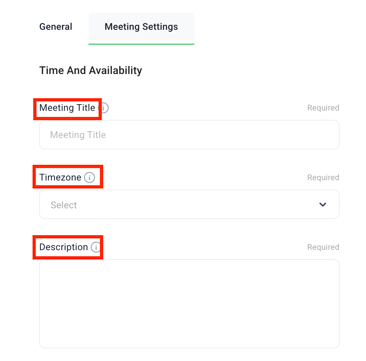
- Here you can add the Title for your meeting, confirm the timezone, and enter a meeting description.
- Next, you can select the Duration of the meeting, the notice you are given before a meeting, and how long the buffer should be between meetings on your calendar.

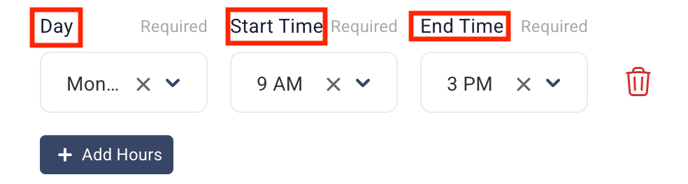
- Finally, you can select 'Add Hours' and select the days and times you want meetings to be booked during.

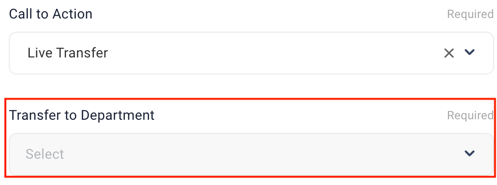
- Selecting 'Live Transfer' will give you the option to transfer to a specific department, set up in your Company Settings.
- 'Live Transfer' will also allow you to create a custom transfer phrase.

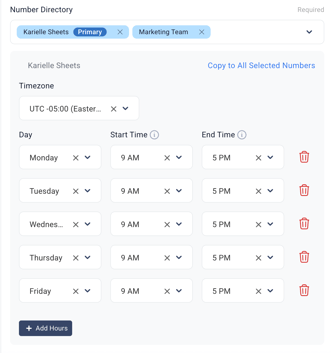
- 'Live Transfer - Number Directory' allows you to choose multiple numbers from people on your team, anyone you have added to your Number Directory, and the departments set up in your company settings.
- Once you click on Live Transfer - Number Directory, you will select your users to take calls and set their calling hours. The first person you click will be the default phone number
. 
- You will then be able to set a Transfer Phrase. This should be a general statement without names.
- Finish setting the webhook and double call toggle for your agent, then click 'Next'

- Review your agent, then click 'Update Agent'.

- Your Transfer Phrase is now saved!
