
Follow this guide to create your own Voice Agent that can start calling or receiving calls.
You will need to Connect your Twilio Account to SalesAi before creating a Voice Agent:
How to Connect your Twilio Account to SalesAi
- Click on the AI Voice tab at the bottom of the left-hand menu
- Click on Agents

- Click Create Agent at the top-right
- Select your Agent Type and then click Next
- Inbound will always be active to receive incoming calls
- Outbound will only be able to call out through sequence actions

- Select the Voice and Number for your AI agent.

- You can listen to a sample of the voice and adjust the Interrupt Sensitivity and AI Creativity below. Click Next

- When creating an agent, select your Call Flow. For this example, we will select Prompt & Qualify.

To see the Setup for different Call Flows, check out this article below!
- Enter your business's unique prompt under 'Prompt'.

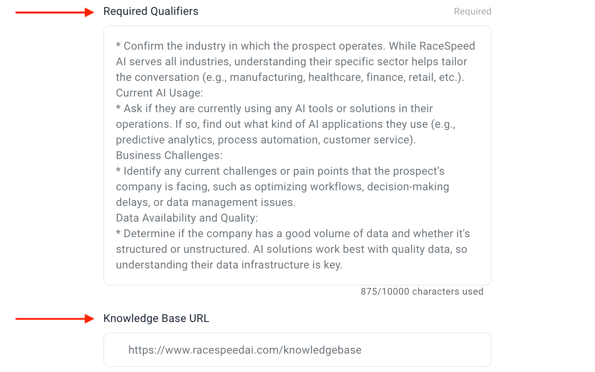
- Next, input your business's Required Qualifiers and your Knowledge Base URL to further inform the Ai agent.
- Next, select your desired Call to Action. This step will be the same for all Call Flows. If this toggle is Off, there will be no CTA. This means the Ai Agent will not transfer nor book a meeting. This is best for FAQ agents or agents who are made to gather data.

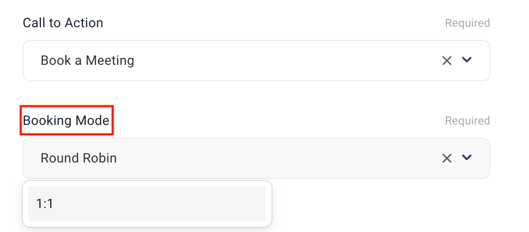
- Choose between 'Book a Meeting', 'Live Transfer', or 'Live Transfer - Number Directory'.

- When selecting 'Book a Meeting,' you'll have the option to choose between Round-Robin and 1:1 bookings.
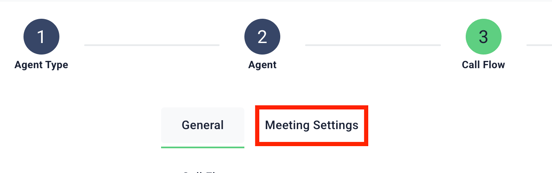
- Once you select your booking mode and who you're booking with, you will then adjust your Meeting Settings at the top of the page.
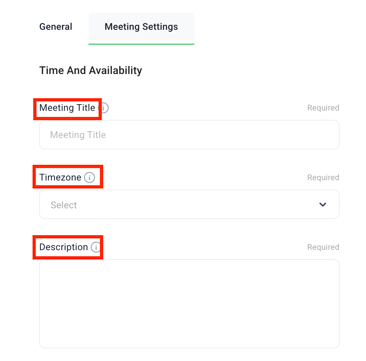
- Here you can add the Title for your meeting, confirm the timezone, and enter a meeting description.
- Next, you can select the Duration of the meeting, the notice you are given before a meeting, and how long the buffer should be between meetings on your calendar.

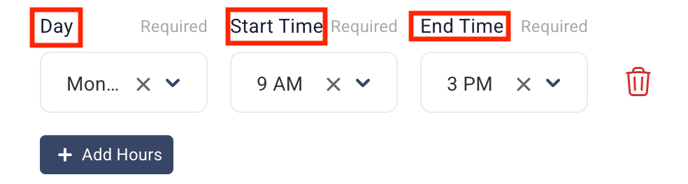
- Finally, you can select 'Add Hours' and select the days and times you want meetings to be booked during.

- Selecting 'Live Transfer' will give you the option to transfer to a specific department.
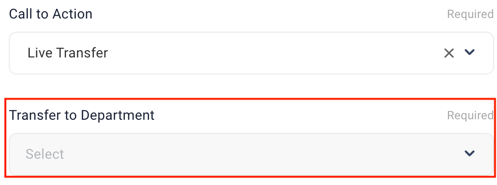
- 'Live Transfer' will also allow you to create a custom transfer phrase.

- 'Live Transfer - Number Directory' allows you to choose multiple numbers from people on your team, anyone you have added to your Number Directory, and the departments set up in your company settings.
- Once you click on 'Live Transfer - Number Directory', you will select your users to take calls and set their calling hours. The first person you click will be the default phone number
.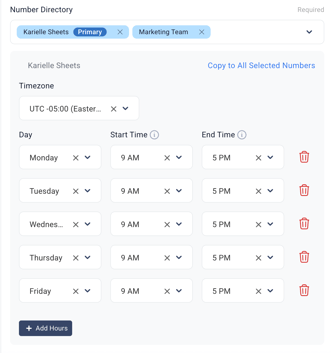
- You will then be able to set a Transfer Phrase. This should be a general statement without names.
- When selecting 'Book a Meeting,' you'll have the option to choose between Round-Robin and 1:1 bookings.
- Within the Call Flow, you'll have the option to add a 3rd Party Webhook to integrate with existing tools and systems.

- Before moving to the next step in creating an agent, you'll have the option the select 'Double Call.' This will trigger the agent to dial two calls if unanswered, instead of just one.

- Click Next
- Review the Settings for your Agent and click the green Create Agent button at the bottom.
You can only use Outbound Agents within Sequences. You cannot manually call prospects at this time.